How to use GIMP to remove a background of your image and replace it.
In this guide, I am going to show you how to remove the background of an image and replace it with something else. The image I will be using is a Raster Image. A quick overview of what a Raster image is. Raster images are made of pixels, or tiny dots that use color and tone to produce the image. Different from Vector which are graphics that is rendered by a computer using a mathematical formula.. CLick on the link for a more detailed explaination: -> Here!
Note that these pictures are slideshows, so you can click on the left and right side of the screen to look at the next images.
What you will need:
- GIMP
- A Image file of you or a subject.
- A Image file of the background you want to use to replace.
STEP 1 to 4:


Step 1: Open up GIMP, and choose your image file.
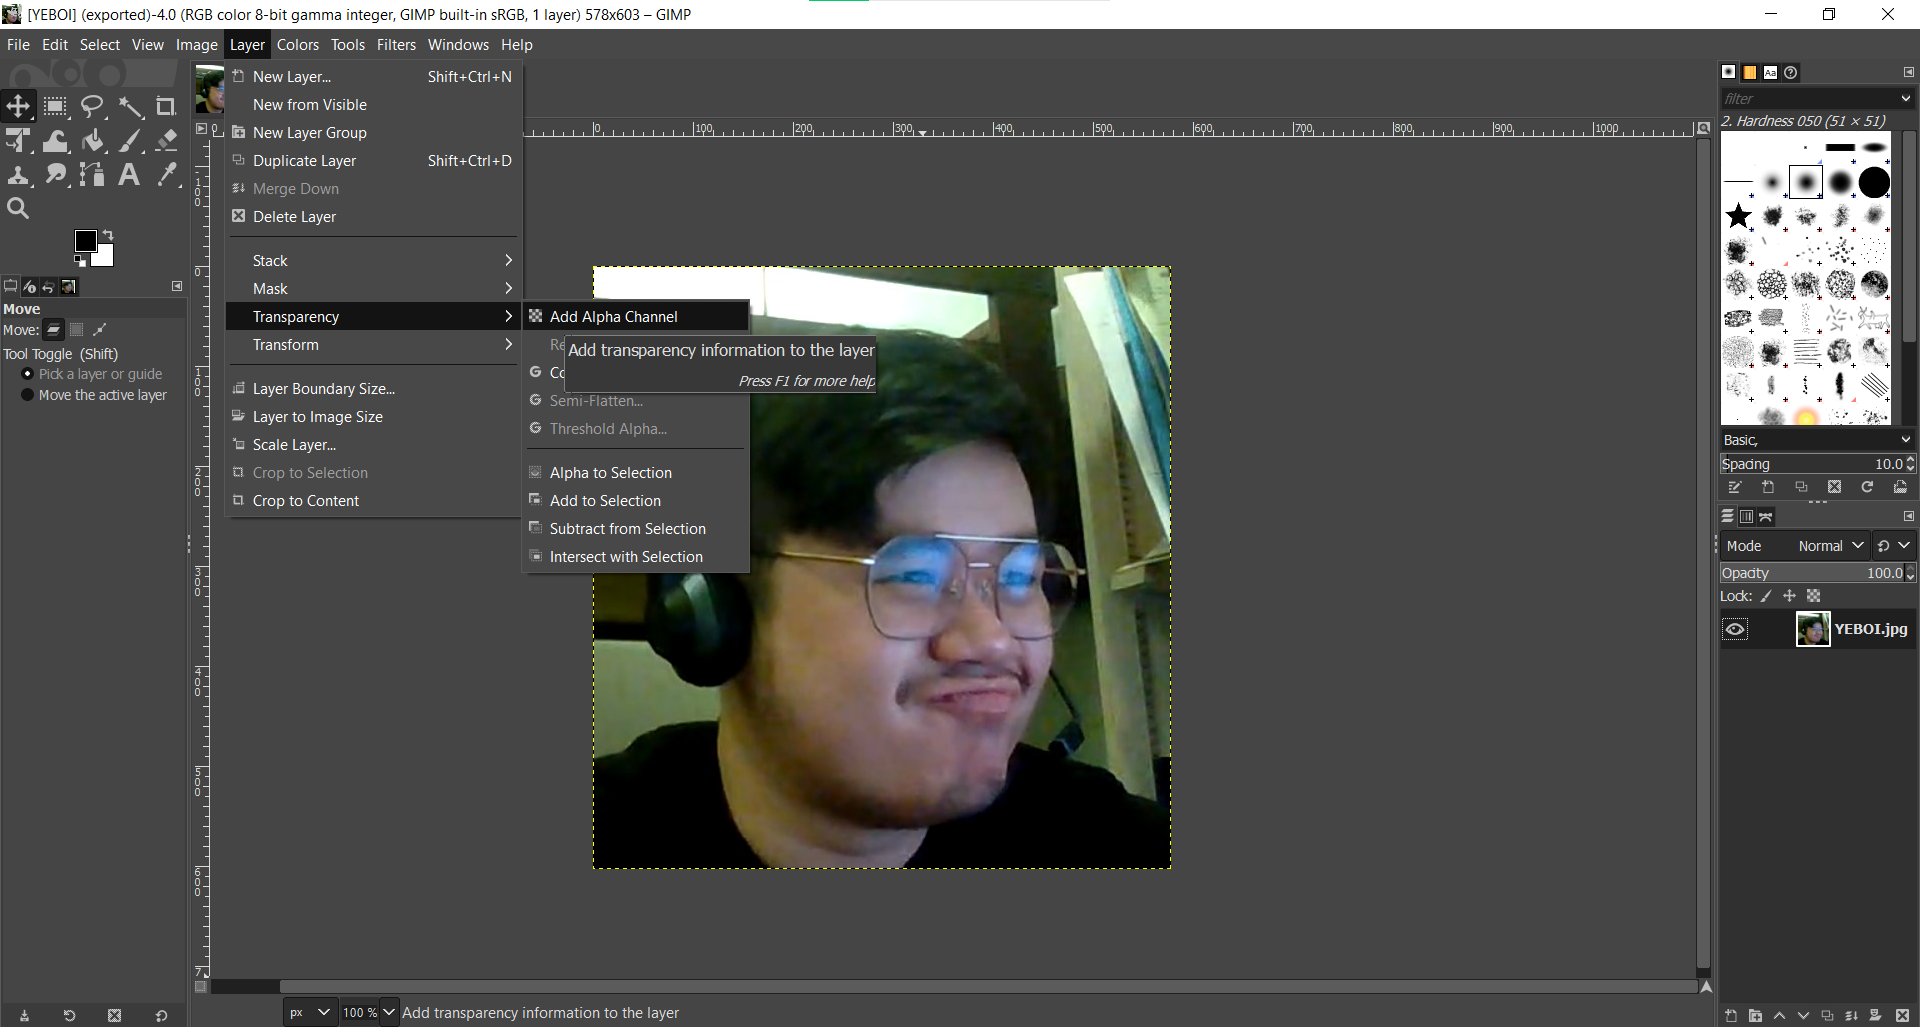
Step 2: Go to Layer and under the Transparency tabm go to 'Add Alpha Channel'
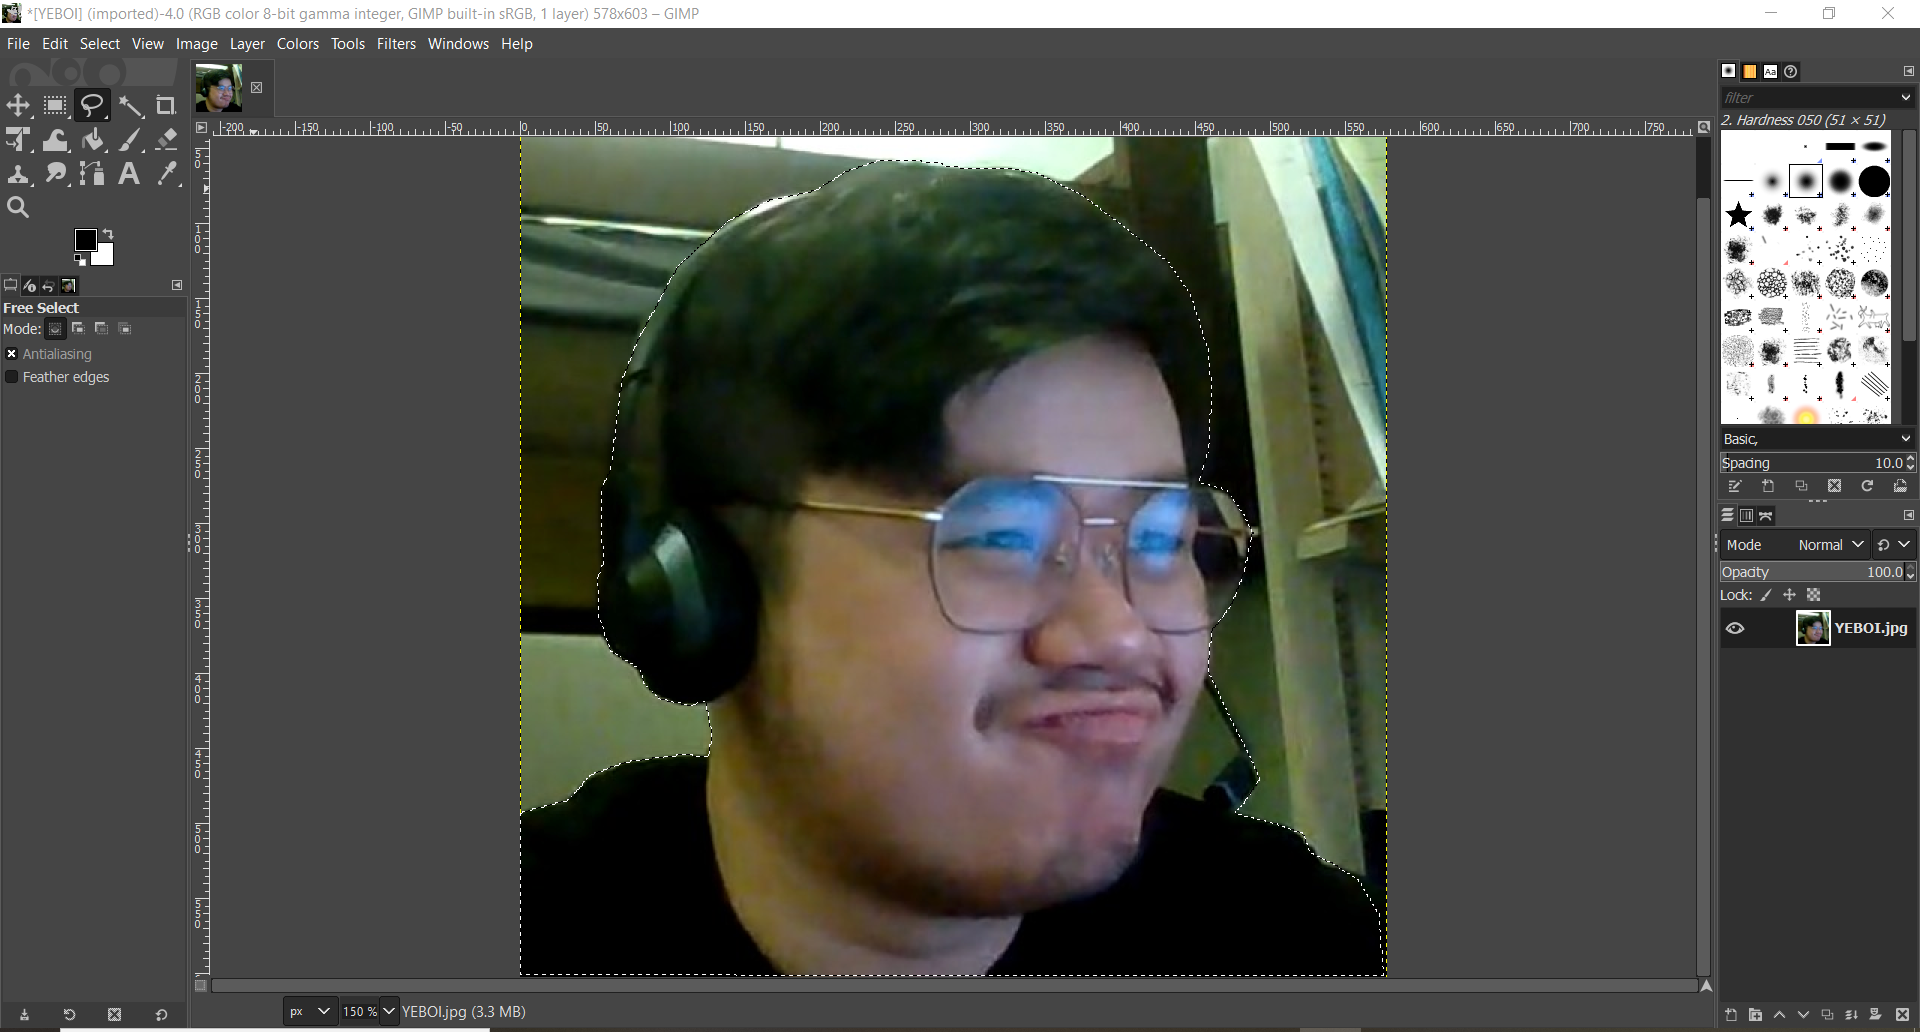
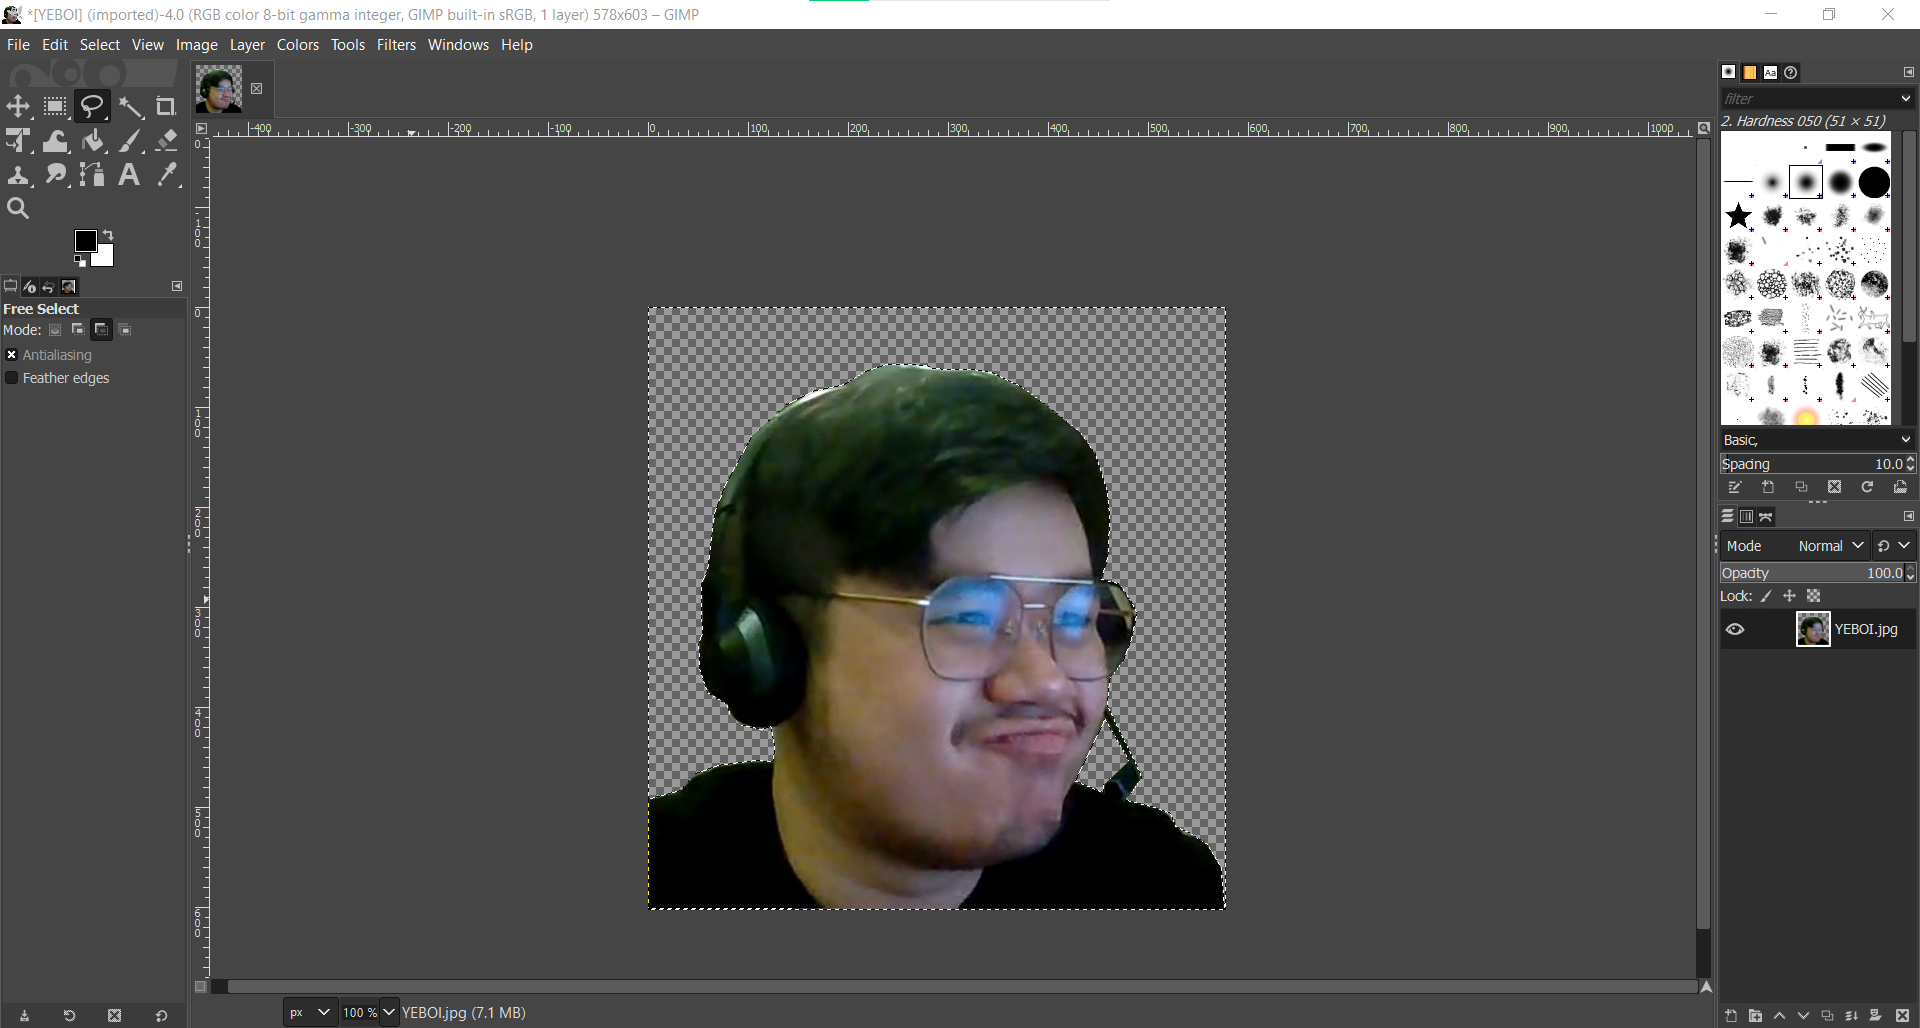
Step 3: Once selected go to the top left corner and find the 'Free Select Tool'.
Step 4: Using the 'Free Select Tool' draw an outline over your subject.
STEP 5 to 8: Sketching the Base and Revolving.
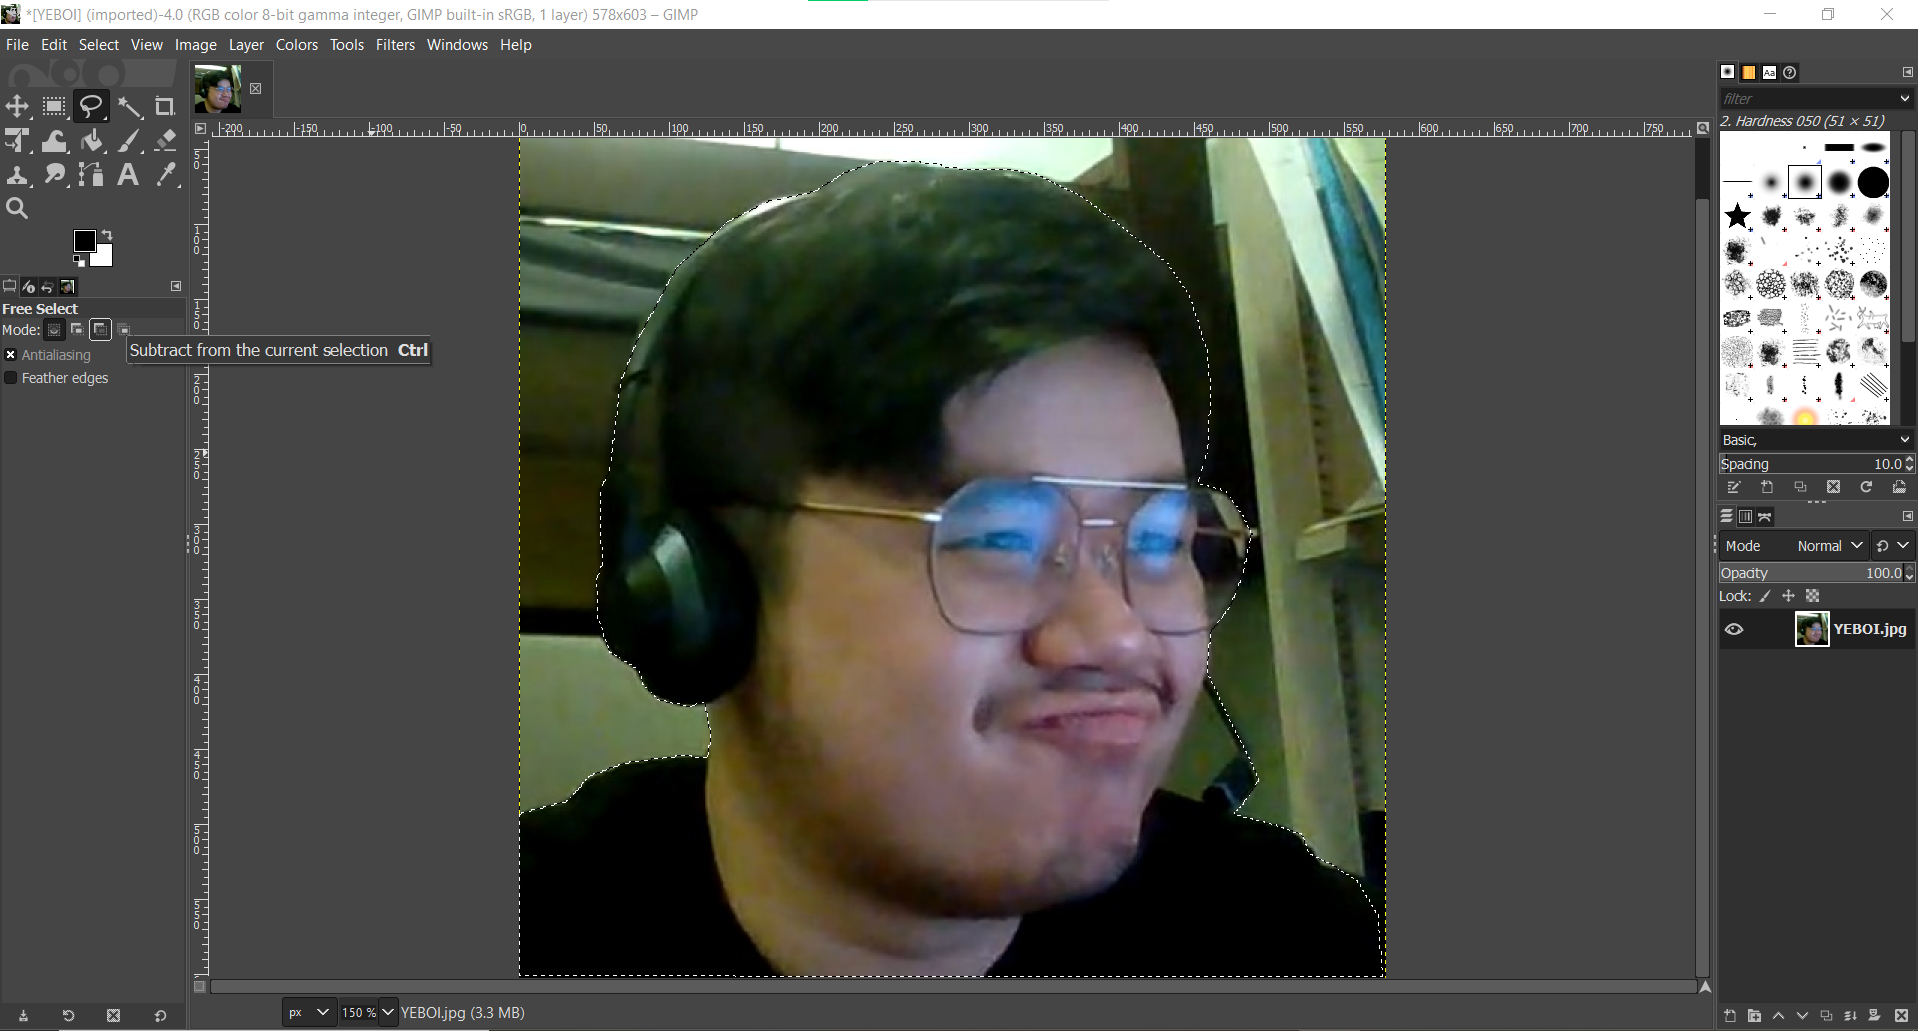

Step 5: Once drawn, hover down to free select and go to the thrid tab from the left. This will allow yo to remove spaces from within your outline.
Step 6: As an exmaple the space between my headset's mic and face still has the background behind it. So I am going to remove it.
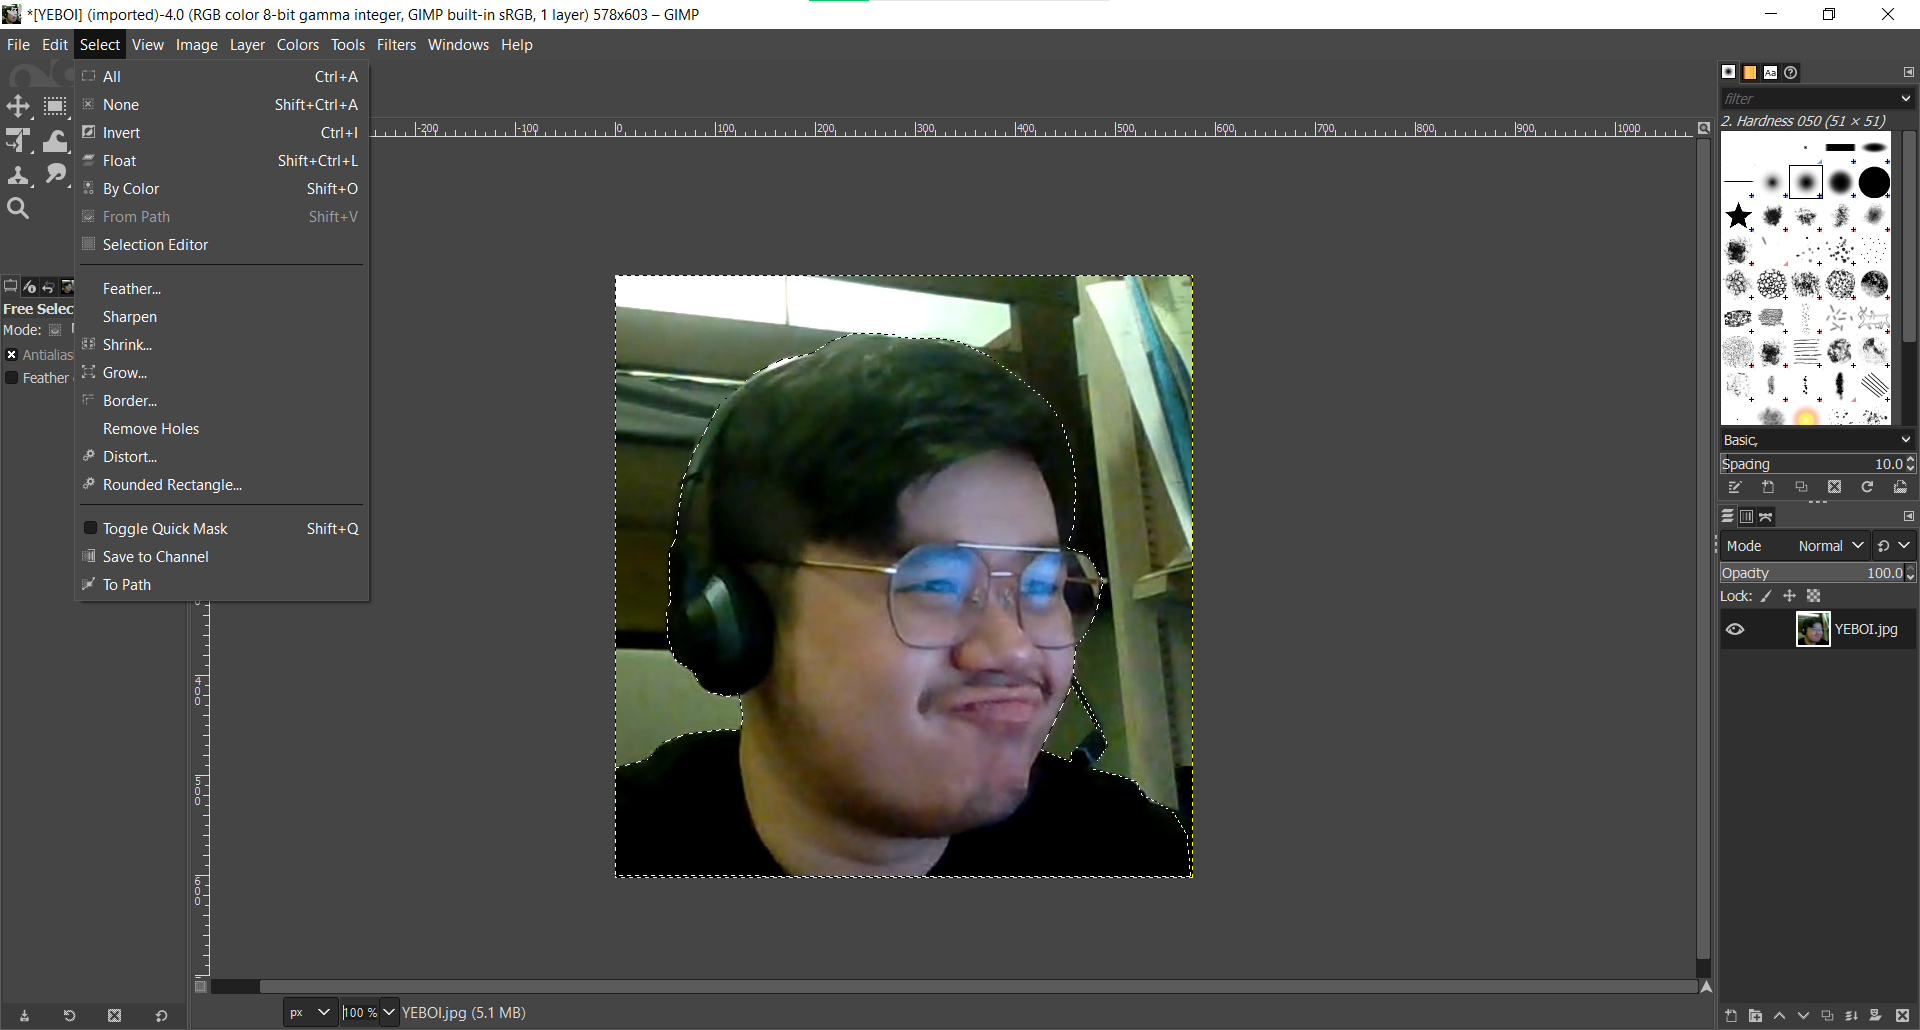
Step 7: Once all selected, go to the top tab and click on select, and then 'Invert'. This is because the outlines that you have drawn is over your subject. So you will have to invert it remove the background.
Step 8: Hit the 'del' key to remove th background.