HOW TO DRAW A KNIGHT CHESS PIECE IN FUSION 360
In this guide, I am going to show you how to make a Knight Piece in Fusion 360. Note that these pictures are slideshows, so you can click on the left and right side of the screen to look at the next images. What you will need:
- Fusion 360
- A 2D Jpg/Png/Image file... of a Knight Chess Piece
STEP 1 to 4: Drawing the Outline
Step 1: Create a new file in Fusion 360 and select the XZ plane.
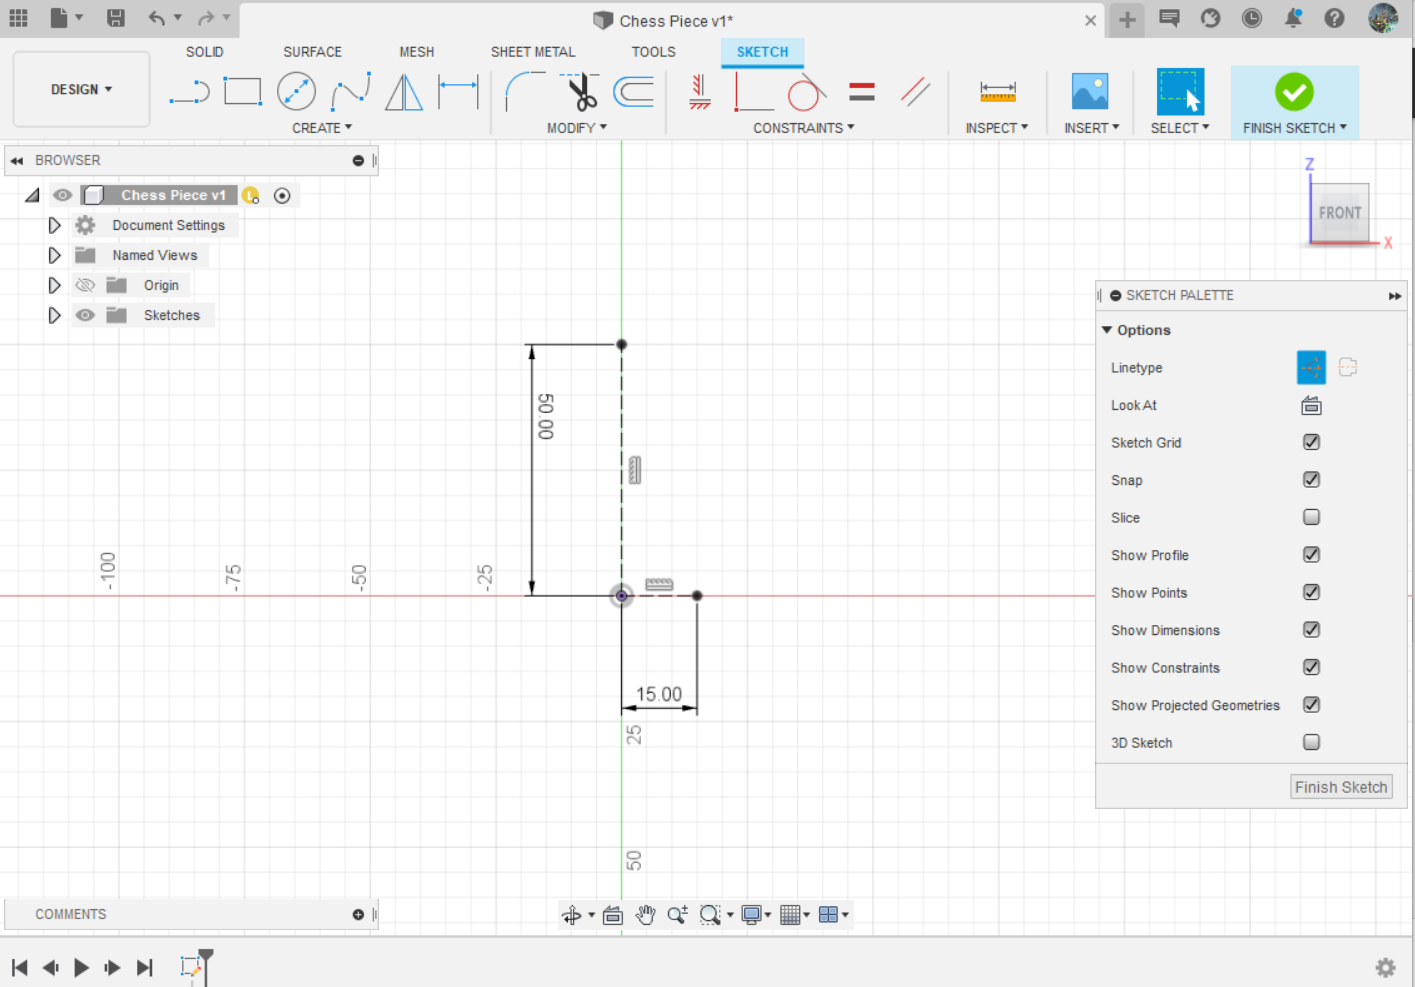
Step 2: In Sketch mode draw 2 lines which will act as your width (15mm) and height (50mm).
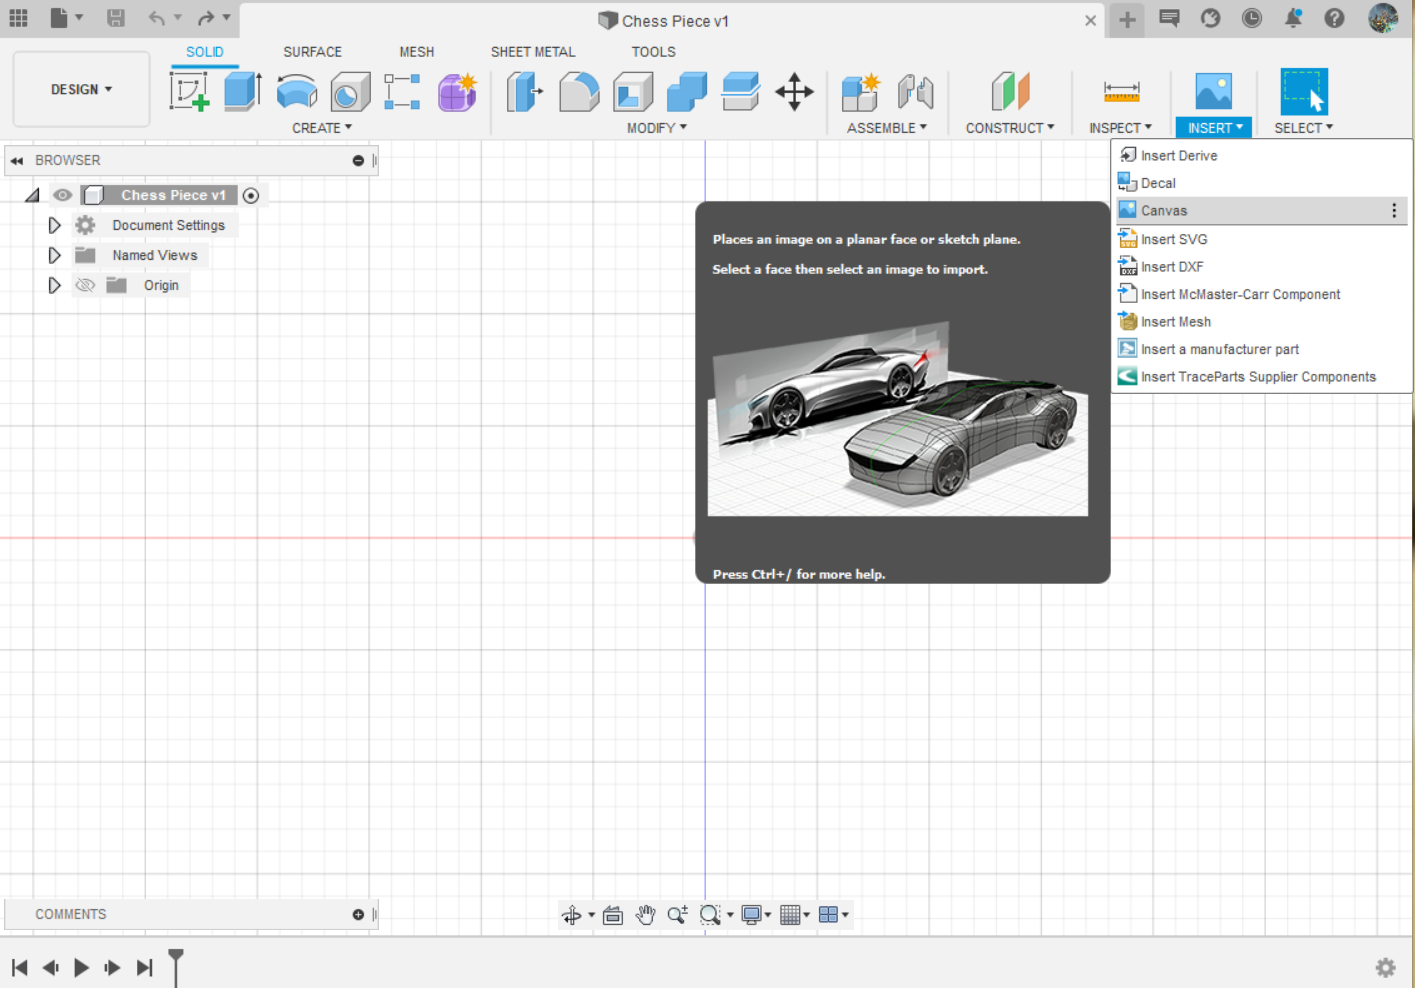
Step 3: Hover over to the Insert tab on the menu section and find the 'Canvas' option.
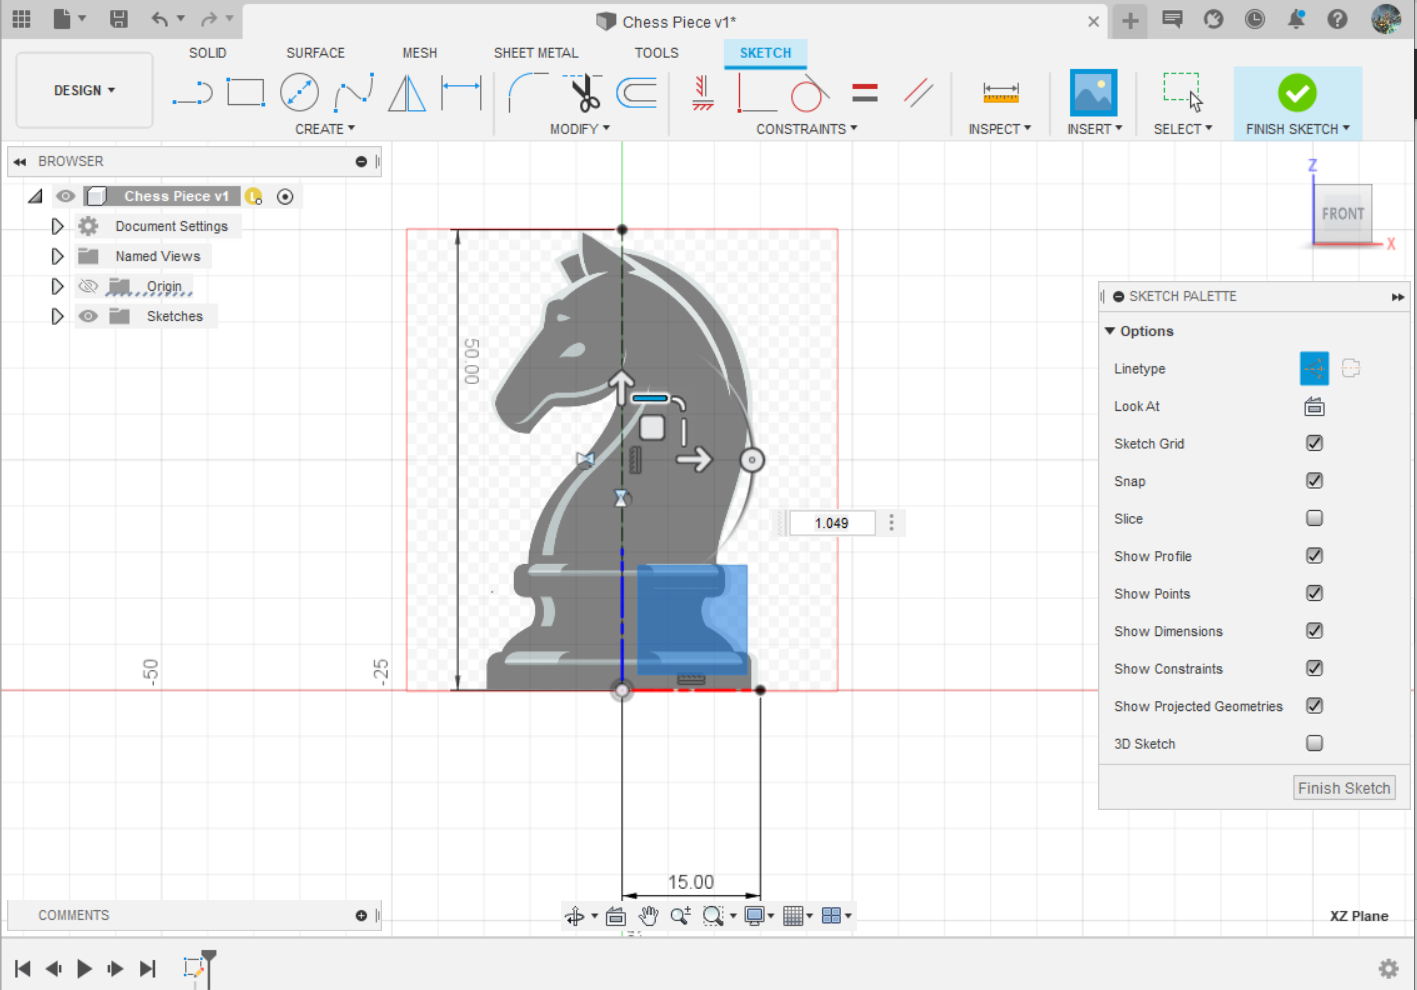
Step 4: Upload the Knight Chess Piece picture you have select and adjust it to fit into the lines you have drawn.
STEP 5 to 8: Sketching the Base and Revolving.

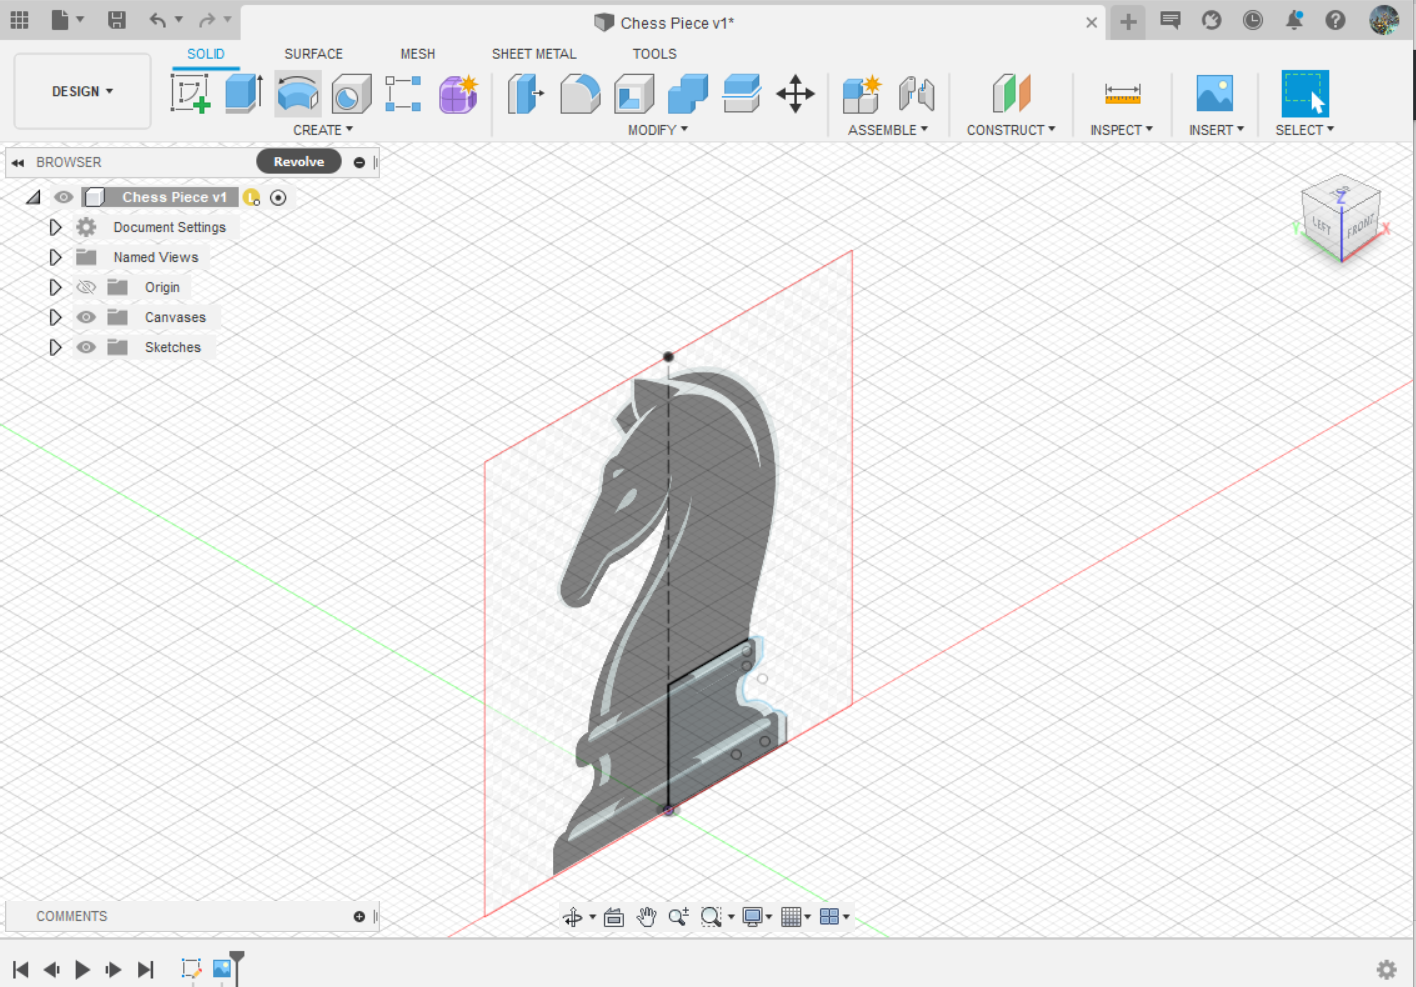
Step 5: On the same plane, using the Sketch Mode, draw half of the base. I use the Spline feature (highlighted in blue) to skectch the curvy part of the base.
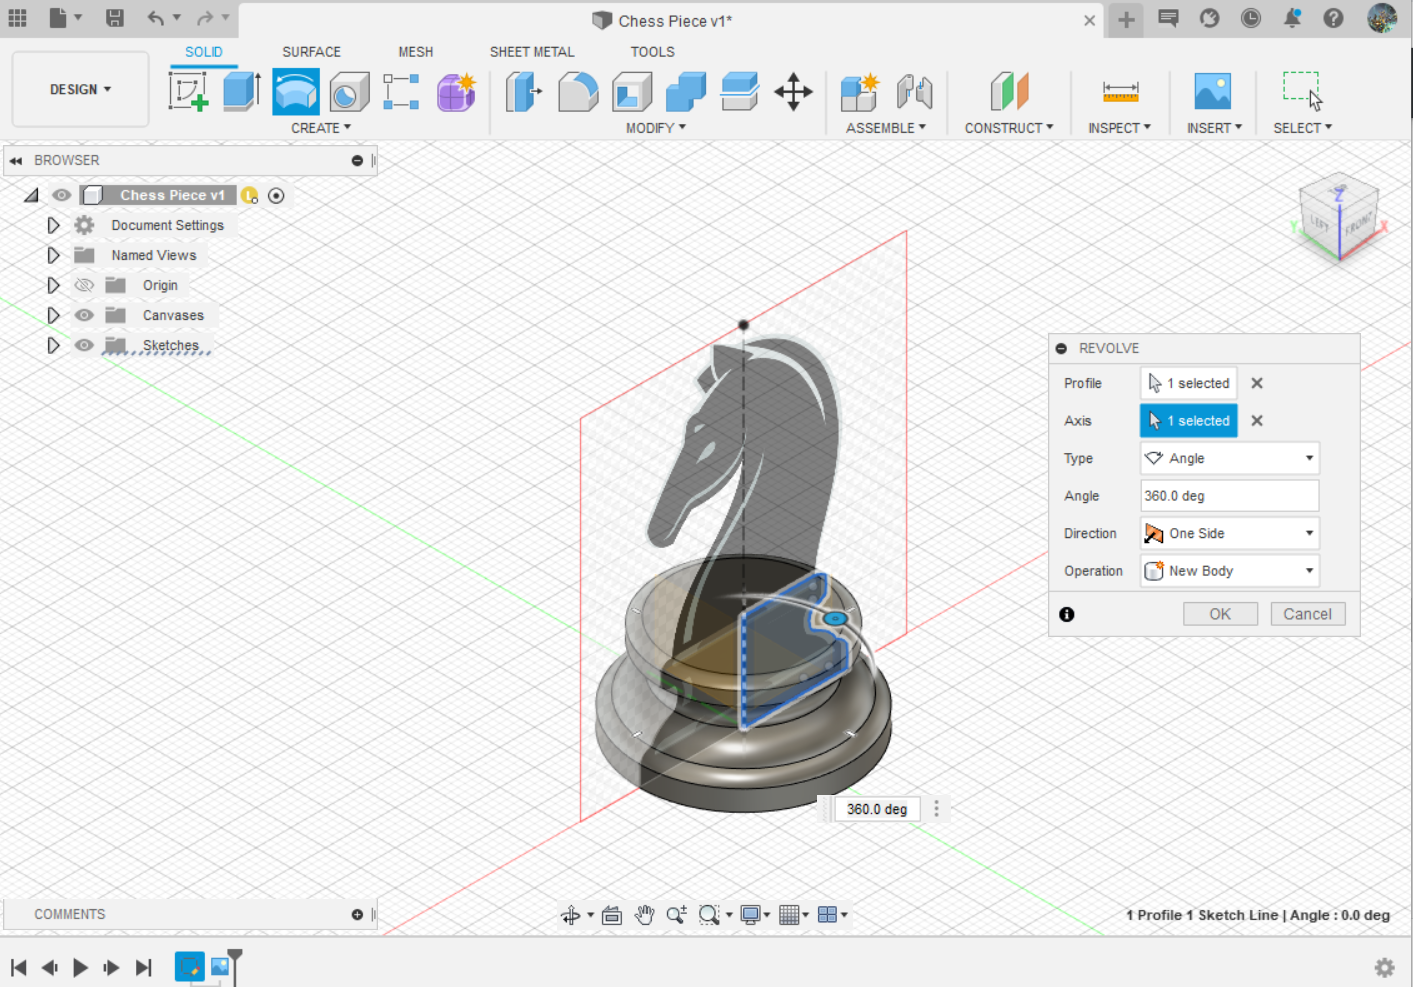
Step 6: On the Solid tab, pick the Revolve option (Third from the left).
Step 7: Once chosen, you can pick the base that you have drawn.
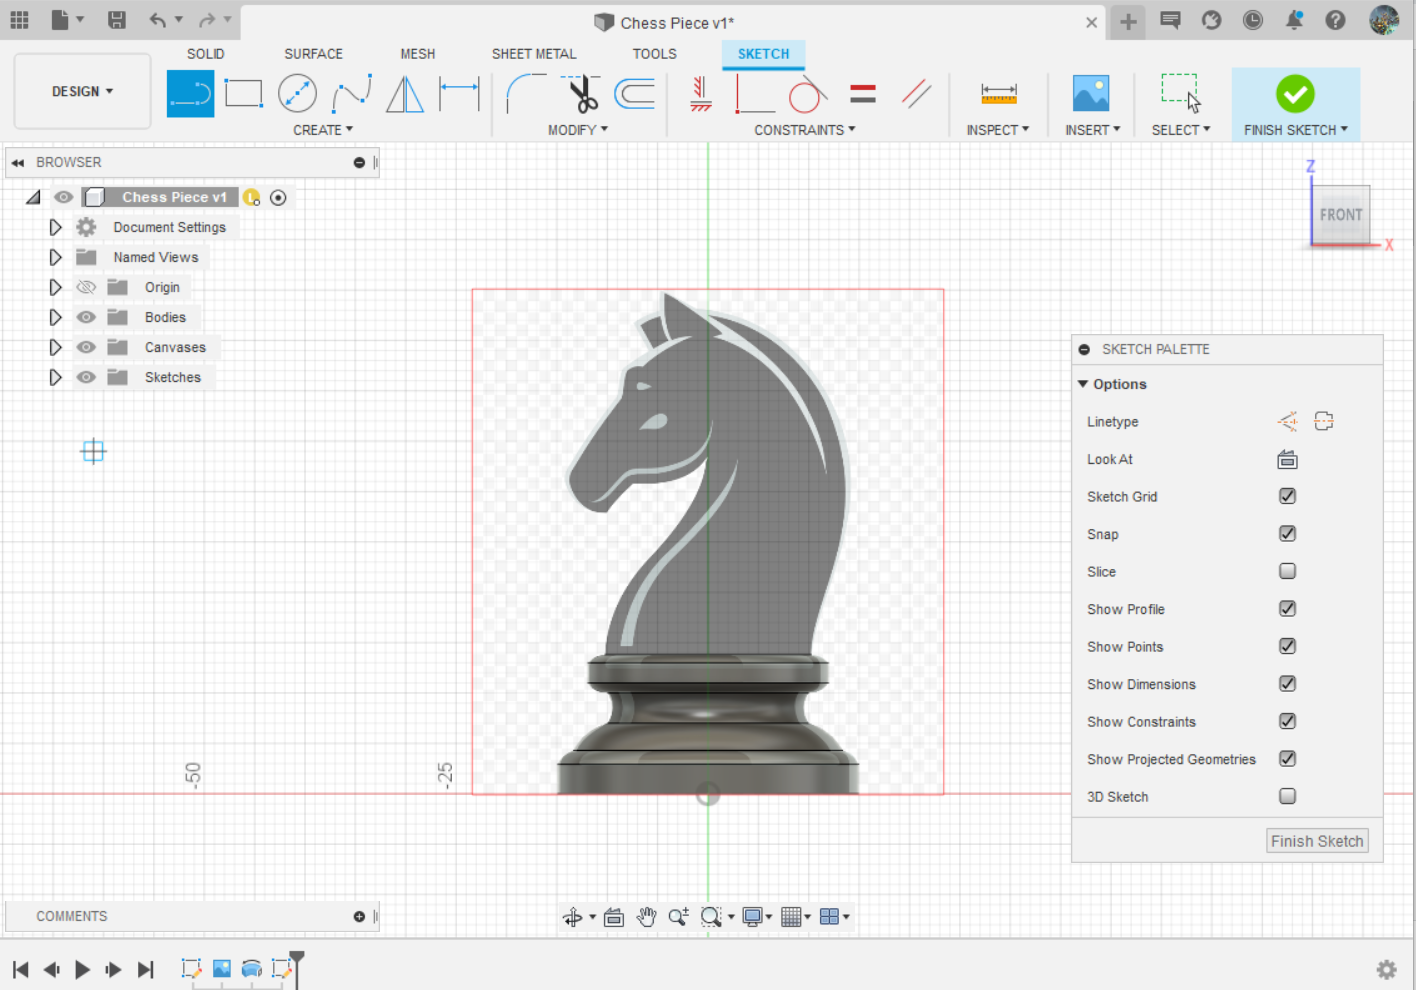
Step 8: After you have finsihed Revolving it should look like this.
Once you are done with step 8. Head on over to the next page for Step 9 - 16. Alternatively, if you have already seen this guide before you can refer to the Tips and Tricks page.